In today’s digital age, taking screenshots has become an essential skill for sharing information, troubleshooting issues, and saving important content for future reference. If you’re a Chromebook user, you might wonder how to take screenshots on this unique platform. Whether you’re a student, professional, or casual user, understanding how to take a screenshot on a Chromebook can greatly enhance your productivity.
This comprehensive guide will walk you through everything you need to know about taking screenshots on a Chromebook, including step-by-step instructions, keyboard shortcuts, and tips for using built-in tools and third-party apps. Let’s dive in!
Understanding Chromebook Basics
Before diving into the specifics of how to take a screenshot on a Chromebook, let’s briefly cover what makes Chromebooks unique. Unlike traditional laptops, Chromebooks run on Chrome OS, a lightweight operating system developed by Google. Chromebooks are known for their speed, simplicity, and integration with Google’s ecosystem. This streamlined design allows for fast boot times, long battery life, and seamless access to cloud services.
Why Screenshots are Important
Screenshots are incredibly useful for a variety of purposes:
- Educational Use: Capture content for assignments, online courses, or sharing information with classmates.
- Professional Use: Share screenshots during presentations, meetings, or tech support.
- Personal Use: Save memorable social media posts, capture online receipts, or document issues for troubleshooting.
Knowing how to take a screenshot on a Chromebook will allow you to document and share information efficiently.
Different Types of Screenshots on a Chromebook
Chromebooks offer several options for capturing screenshots:
- Full-Screen Screenshot: Captures everything displayed on your screen.
- Partial Screenshot: Allows you to select a specific portion of the screen to capture.
- Window Screenshot: Captures a single window without capturing the full screen.
Each method serves different purposes, and we’ll explore how to use them effectively.
How to Take a Full-Screen Screenshot
To capture everything on your Chromebook’s screen:
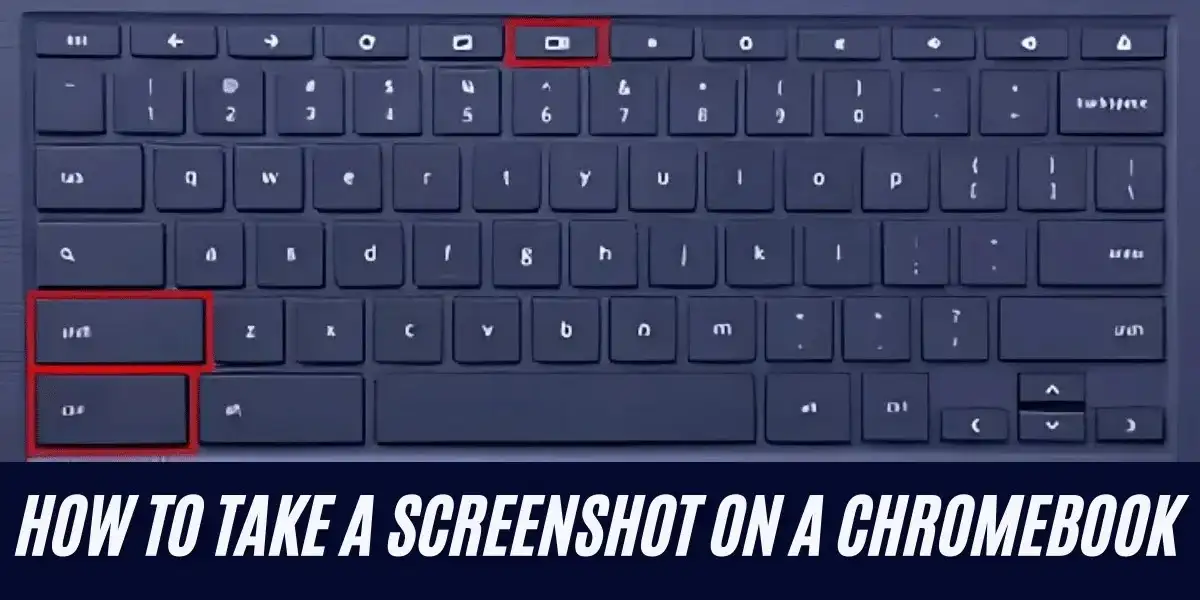
- Press the
Ctrl+Show Windowskey (the key that looks like a rectangle with two vertical lines, usually located in the top row). - Your screen will briefly flash, indicating that the screenshot has been taken.
- The screenshot will automatically be saved in the “Downloads” folder.
Keyboard Shortcut Recap:
- Full-Screen Screenshot:
Ctrl+Show Windows
Capturing a Partial Screenshot
If you only need a portion of your screen:
- Press
Ctrl+Shift+Show Windows. - Your cursor will change to a crosshair.
- Click and drag to select the area you want to capture.
- Release the mouse button to take the screenshot.
- The captured image will be saved in your “Downloads” folder.
Keyboard Shortcut Recap:
- Partial Screenshot:
Ctrl+Shift+Show Windows
How to Take a Window Screenshot
Capturing a specific window is perfect when you want to focus on a particular application:
- Press
Ctrl+Alt+Show Windows. - Click on the window you wish to capture.
- The screenshot will be saved in the “Downloads” folder.
Keyboard Shortcut Recap:
- Window Screenshot:
Ctrl+Alt+Show Windows
Using the Screen Capture Tool
With the recent Chrome OS updates, a built-in Screen Capture tool is available:
- Click on the Time in the bottom-right corner of your screen.
- Click the Screen Capture button (camera icon).
- Choose between full-screen, window, or partial screenshots.
- Capture videos as well as still images using this tool.
The Screen Capture tool offers flexibility and even allows screen recording, making it a versatile option for both screenshots and video captures.
Also read: Simple:D32lkumiol0= Tattoo Ideas| Swasthya Ingit Login | SRAAP Student Login | AKGEC ERP Login
Where to Find Your Screenshots on Chromebook
By default, all screenshots are saved in the “Downloads” folder. To access them:
- Open the Files app from your app launcher.
- Navigate to the Downloads section.
- Look for files named “Screenshot” followed by the date and time.
If you want to change the default save location:
- Open the Screen Capture tool, click the settings gear icon, and select a new save location.
Editing Your Screenshots
Once you’ve taken your screenshot, you may want to make some edits:
- Built-in Editor: Chromebook has a simple built-in image editor that lets you crop, rotate, and add annotations.
- Third-Party Apps: Consider using apps like Google Photos, Pixlr, or Canva for more advanced editing options.
Taking Screenshots Using External Apps
If you’re looking for more features, you can use Chrome extensions like:
- Lightshot: Offers easy-to-use screenshot tools with editing capabilities.
- Nimbus Screenshot & Screen Video Recorder: Perfect for both screenshots and screen recordings with annotations.
- Awesome Screenshot: A powerful tool for capturing, editing, and sharing screenshots.
These extensions can be added via the Chrome Web Store and provide additional functionality.
Tips for Troubleshooting Screenshot Issues

Sometimes, you may encounter issues when taking screenshots on your Chromebook. Here are a few solutions:
- Screenshots not saving: Ensure your “Downloads” folder is not full and that you have sufficient storage space.
- Wrong keyboard shortcuts: Double-check you’re using the correct shortcut combination.
- Permissions issues: Make sure Chrome OS has the necessary permissions to save screenshots.
Conclusion
Knowing how to take a screenshot on a Chromebook can significantly enhance your productivity. Whether you need to capture full screens, partial sections, or specific windows, Chromebook offers various options to meet your needs. By mastering the shortcuts and tools available, you’ll be well-equipped to capture and share content effortlessly.
From using built-in shortcuts to exploring advanced Chrome extensions, this guide has covered everything you need to know about capturing screenshots on a Chromebook. Whether you’re a student, professional, or tech enthusiast, these skills will come in handy for various scenarios.
Now that you know how to take a screenshot on a Chromebook, try it out and take your productivity to the next level!
Frequently Asked Questions (FAQ)
Q1: Can I take a screenshot in tablet mode?
A: Yes, press the Power button + Volume down simultaneously.
Q2: How do I take a screenshot on an external keyboard?
A: Use the Ctrl + F5 keys for a full-screen screenshot.
Q3: Can I change the file format of my screenshots?
A: Chrome OS saves screenshots as PNG files by default, but you can use an image editor to convert them to JPEG or other formats.

